TUTORIAL || Star Trek Inspired Makeup Look [Command Red]

Happy First Contact Day, everyone!! Happy First what? Sorry, I think some explanation is needed for the non-Star Trek fans out there - today is First Contact Day. On April 5th, 2063, Earth will make first contact with the alien race known as the Vulcans. It's all explained in the movie, Star Trek VIII First Contact. That movie is by far my favourite of all the movies, all 12 (new ones included). It's just so good! I'm probably going to go watch it again after writing this post up. To celebrate First Contact Day, or FCD for short, I'm bringing you a week of daily Star Trek related posts, starting today!
Today, I'm bringing you an eye makeup look that incorporates the colours of the Command Department - the red shirt. Back in the day of the Original Series, the red shirted crewman was coincidentally the one killed on an away mission. JJ Abrams paid homage to this during Star Trek XI (the one with Chris Pine) when engineer Olsen died on the space dive to the orbital platform. However, from Star Trek: The Next Generation (the one with Patrick Stewart), the red shirt changed to the colour of those in command departments, i.e. the Captain, First Officer, Helmsman etc. With that being such an important role on the functioning of a starship, I thought that I would bring you this makeup look that incorporates the colours of the command uniform first.
Before starting on my eye makeup I took care of my foundation and base. To start with, I used L'Oreal's Infallible Mattifying Primer and the corresponding Infallible Foundation (Porcelain & Vanilla mixed together). To blend in the foundation I used my Sigma F80 Flat Top Kabuki brush. Then for concealer I used my Maybelline Fit Me Concealer in the shade 15 alongside the Collection Lasting Perfection concealer in Fair. I blended both of these out in turn with my Real Techniques Setting Brush. Then to set everything I used Maybelline's Fit Me pressed powder (120 Classic Ivory) on a Real Techniques Powder Brush. Using the Collection concealer, I then primed my eyelids, blending it out with my finger and setting it with the same Maybelline powder.
Before moving to the makeup, I am aware that it turned out a bit more on the purple side than it should've been. But I don't have any properly red eyeshadows. However, the tone of this look leans more towards the shade of red used for the Command uniforms on Star Trek: The Next Generation. (That's my excuse and I'm sticking to it.)
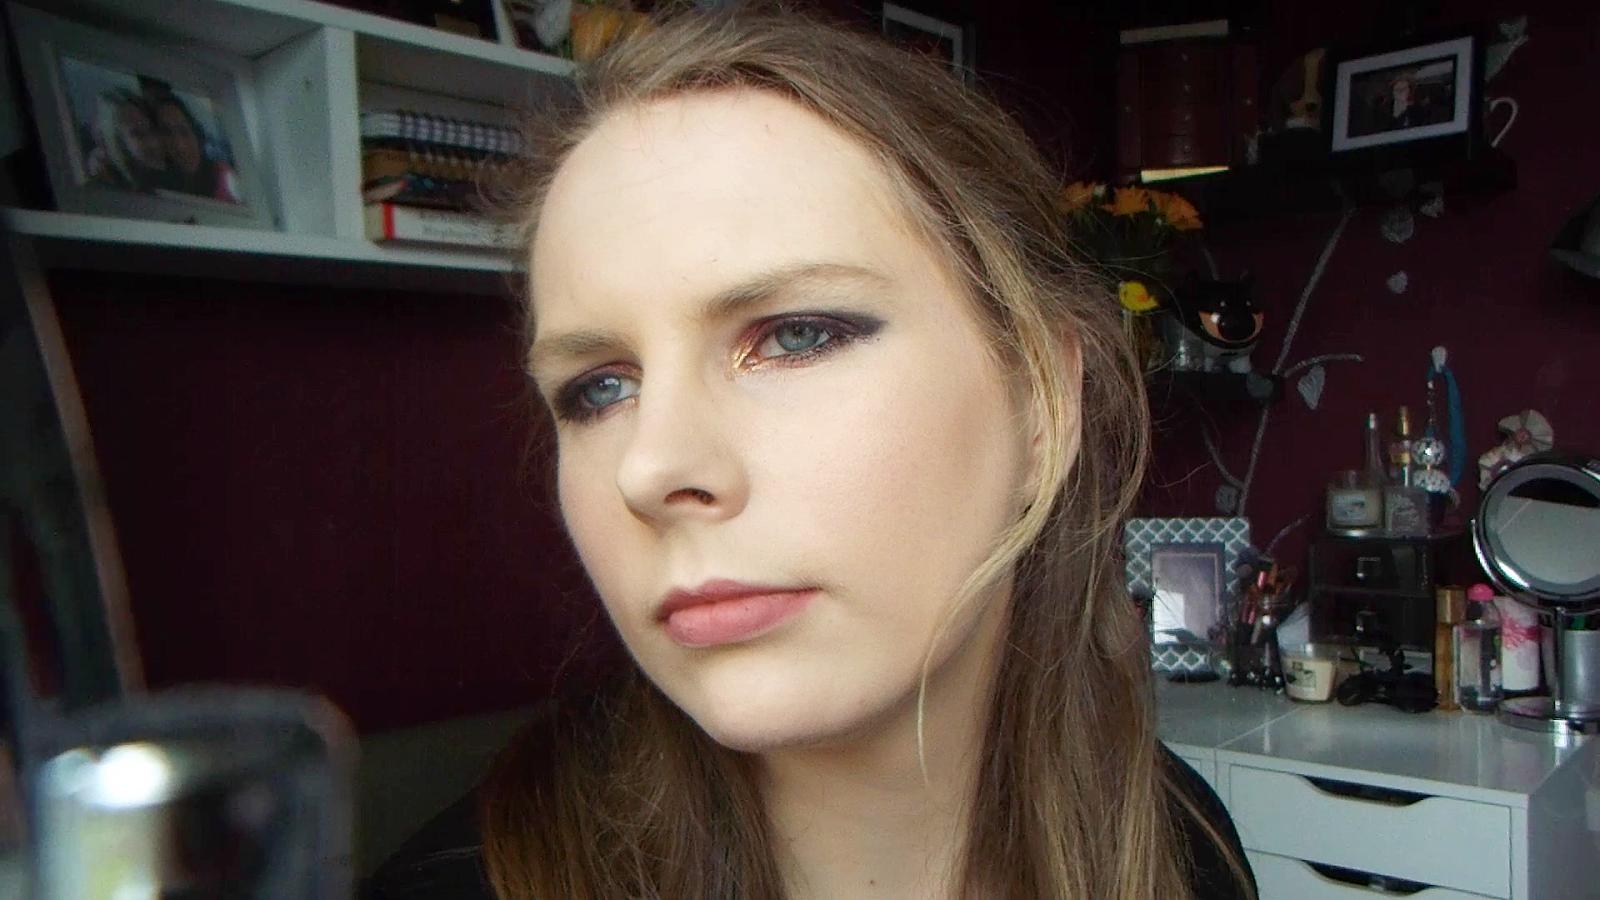
THE LOOK


- I started off with the brows. I don't have a 'Brow Game' because my brows are a mess naturally but I used Soap & Glory's Archery eyebrow pencil to fill in the sparse parts. I don't use the pencil to change it's shape or anything fancy like that. I merely put my brows on the map, as it were.


- For my eyeshadow base I took Maybelline's Color Tattoo in the shade 70- Metallic Pomegranate and applied it all over my lid using my finger. Then to increase the intensity a little bit and to clean it up, I took more of the cream shadow on a brush and patted it all over the lid - I used one that I bought in Sephora in Venice.


- I then took a darker red shade to give the look some depth and dimension. Using The Nude'tude eyeshadow palette from The Balm, I took the Sexy shade on my MAC 217 brush (but any fluffy blending brush will do the trick) and applied this initially to my crease before sweeping what was left on my brush over the lid.


- I wanted to add a little bit of umpf to this look so I took my Eyes Like Angels eyeshadow palette from Makeup Revolution and with my Real Techniques Base Shadow Brush applied Sophisticated Pink all over the lid in light patting motions.


- On the Blend side of my EcoTool Duo Eye-enhancing brush, I took Panther eyeshadow from Wet N Wild. This is a gorgeous black eyeshadow! It's beautifully pigmented and I use it a lot to line my upper lashline. That's what I'll do with it in a moment but for now, I'm using that fluffy brush and applying this to the outer corner of my eye, covering the outer third and creating a > shape there. I blended this out and brought it up into my crease to about half way.
- Looking back, I would've packed Panther on more as it turned somewhat purple with the metallic shadows underneath.


- I then took that Panther eyeshadow onto an angled liner brush (I used the reverse end of my EcoTools brush) and lined my upper lashline. This doesn't have to be a harsh thin or even a very neat one. It's simply to make your lashes appear fuller and definie your eyes.

- This is optional but I then took Sophisticated Pink on a smudger brush from UBU and ran it under my bottom lashes very lightly.


- Using my Helen E Soft Black eyeliner, I lined my waterline and tightline.


- After curling my eyelashes, I coated my upper lashes with several coats of Maybelline's The Rocket mascara. This is my favourite mascara for really thick, black lashes.


- For my lower lashes, I used Seventeen's FlasifEye HD mascara*. I love how thin this wand is and it's perfect for getting at those fiddly lower lashes. I used the tip of the wand for more precision application.


- To represent the pips of the uniform - or to pay homage to the Admiral uniform - I took a shimmery gold eyeshadow from the Ultimate Eyeshadow Palette from Makeup Revolution and applied it to my inner corner. I used an EcoTools Duo Eye Enhancer smudge brush. I dipped the brush into a small amount of eye drop solution. This will intensify the pigmentation of the eyeshadow.


- Moving on to the rest of my face - I used Max Factor's Creme Puff Blush in 05- Lovely Pink to bring some colour to my cheeks. I used my Real Techniques Blush Brush.


- I contoured my face a little usiing Urban Decay's Naked Flushed palette (shade: Streak). Using a No7 Highlighter & Contour brush, I applied the bronzer from this palette to the hollows of my cheeks, just under my cheek bone and blended it out and upwards. Then I took the bronzer to my temples, jawline and hairline to warm up my face, making sure to blend it out.


- I wanted to use a hightligher and took that centre part of the Urban Decay Flushed palette and using the Highlight side of the No7 duo-ended brush, brushed it over the tops of my cheekbones very lightly.


- Not forgetting lips. Since the eye makeup is so strong and smokey, I wanted to go with a nude lip so that it's not overdone and over-the-top. I used Rimmel's Exaggerate lip liner in the shade East End Snob and filled my lips in with it.
And the application process is complete!


Fun fact, you can't see it but I was wearing a commbadge on my top as I filmed this tutorial. I confess that I have worn it under my fleece at work on occasion - yesterday being one of them. I have my priorities and it gets me through the day.
I hope that you enjoyed this tutorial and this look. I'll be going through all of the department colours with Operations coming up next and then Science later in the week. Make it so!

Disclaimer - * Seventeen FalsifEye HD mascara was gifted to me by Boots. It was sent to me as part of their #BeautyTimeMachine scheme were they gifted those on Twitter with a beauty goodie to help emulate whoever they tweeted a reply with. I tweeted back with Katharine Hepburn. I am not being compensated in any way to use this product and have not been paid anything.


Comments
Post a Comment